The beginning of a New Year is a time for planning. Having just finished the Christmas season, and not had enough time to hand-craft as many gifts as I had wanted, I came up with the idea of a Craft Calendar.
It can be as simple as just writing things down on your wall calendar, or programming them into your blackberry. But the idea is to plan out the things you want to hand craft, so you leave yourself enough time.
So think of all the people to whom you would like to give a handcrafted gift, and when their birthdays are, and what you would like to make them. Think about Christmas, and what homemade gifts you would like to give, and even what wrapping and decor you might like to create.
Now you can schedule it out. The thing is that by the time someone's birthday normally makes it on to your radar, you probably don't have enough time to knit them that nifty scarf, or make the photobook and have it shipped, or whatever. And Christmas is so busy. It really helps a lot if you can stretch out making Christmas gifts all year long.
So think about what you'd like to make for whom, and by when, and write it down on a calendar!
Wednesday, December 30, 2009
Thursday, December 10, 2009
Got my umbrella from ArtsCow!
I love it! I will post a picture as soon as I get a good one. I'm very pleased with the print quality. The construction of the umbrella itself - I'd call it "budget". It doesn't have a button to open automatically, for instance. My mom is going to be tickled pink!
I took the speech my uncle wrote at her wedding, and an old wedding photograph of my mom and my dad, put it together with some scrapbook papers and embellishments, and ArtsCow printed it on an umbrella.
I got the whole thing, with shipping for $18! (On special - that isn't the normal price.)
I took the speech my uncle wrote at her wedding, and an old wedding photograph of my mom and my dad, put it together with some scrapbook papers and embellishments, and ArtsCow printed it on an umbrella.
I got the whole thing, with shipping for $18! (On special - that isn't the normal price.)
Thursday, December 3, 2009

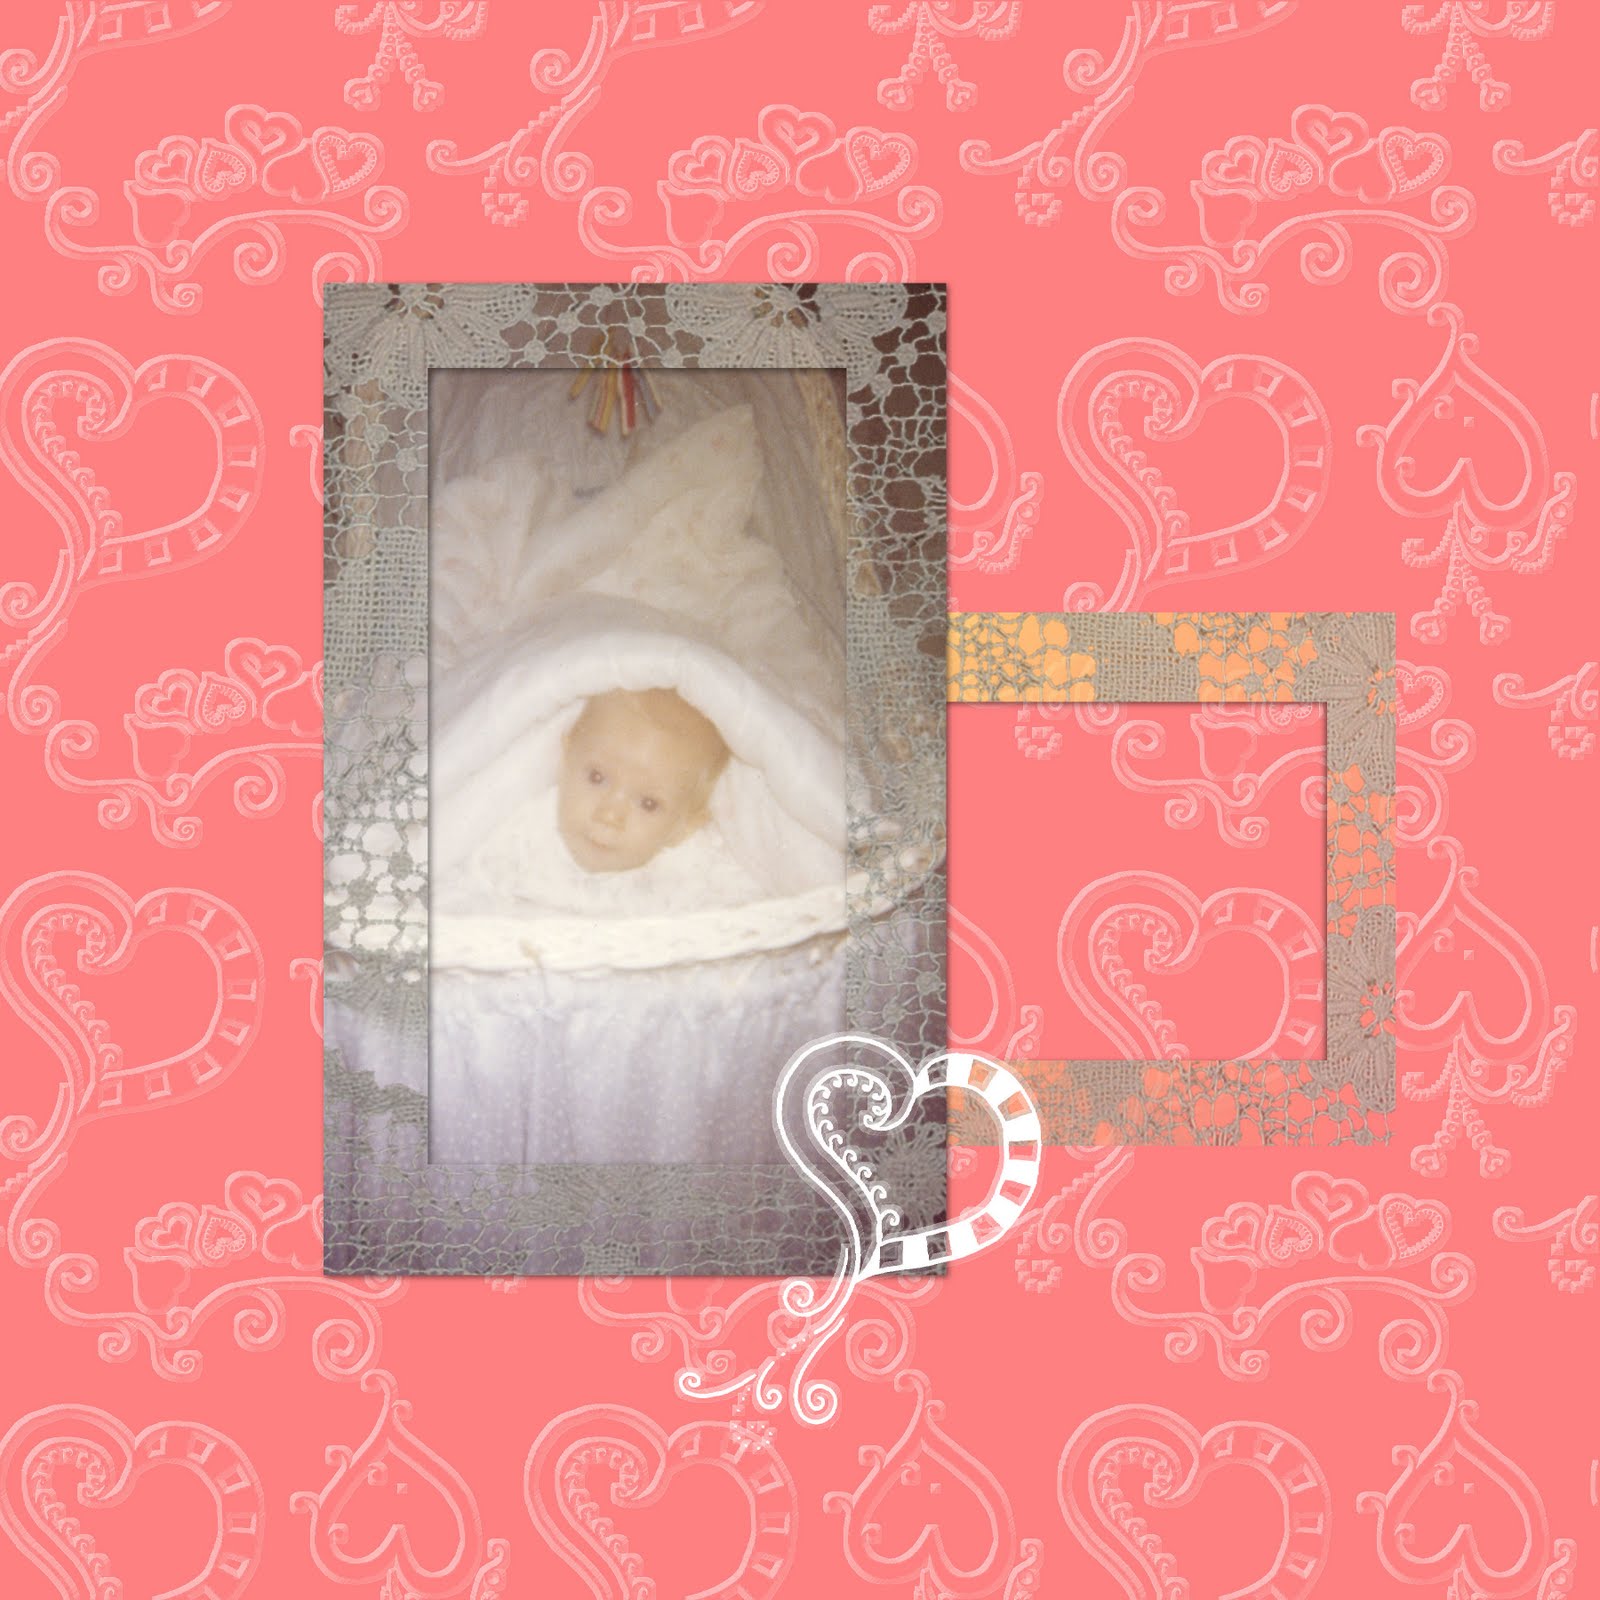
Two Peas in a Pod - new kit!

This kit has 4 background papers, a scalloped green overlay, a curlicue heart embellishment, a hand-drawn peapod frame for two photos, 1 title, and 4 peapod drawings (parts of the peapod you see here).


KhakiFest! New Freebie!
 I have created another freebie for you! This one is a love affair with khaki, and colors that go well with khaki. Enjoy! The next few posts will be example pages made with this kit.
http://www.4shared.com/file/165124833/d500d620/LisaBear_KhakiFestKit.html
Thursday, November 26, 2009
Freebie Kit is available for download!!!

I found a site to host my first scrapbooking kit "Gentle on My Mind". It is here:
http://www.4shared.com/file/160323818/f2c3db3f/LisaBear_GentleOnMyMindKit.html
I would love it if you would leave a comment. I've never had a comment on my blog yet! I don't know if you can post pictures with your comments, but I would love to see any pages you make with this kit. Happy scrapping!
I hope you like this kit!
Wednesday, November 25, 2009


My first freebie kit!
 I have put together my first digital scrapbooking kit! I am still trying to figure out how to make it so you can download the zip file for free. But here is a picture of everything in the kit. It has 6 background papers, 3 frames, 1 curlicue overlay, 2 torn paper borders, 1 ragged heart mask, 4 skeleton leaf embellishments, 3 curlicue embellishments, and 3 watercolor heart embellishments. I call this "Gentle on My Mind". I envision it being used for baby pictures galore!
The next 4 blog entries are examples of pages I have done using this kit.
Saturday, November 21, 2009
Put your art on an umbrella

I found this nifty idea at www.artscow.com. They have some unique photo gifts. Anyway you can put your own art on an umbrella. Or you can use their templates and load photos. I made one for my mom with a wedding photo and the speech my uncle wrote for my mom and dad's wedding. I hope she likes it!
Monday, November 9, 2009
Beautiful Freebie Find
Leave Mary a nice comment. I found a really pretty freebie she has on her blog here: http://mh-mixes.blogspot.com/2009/11/16109.html
Friday, October 30, 2009
Tuesday, September 22, 2009
Nifty Use for Eraser Tools
 This is a fun and creative way to create a scrapbook layout that you can't do very easily if at all with traditional scrapbooking. This can be done with any photo editing software that has layers and an eraser tool (which is most, if not all of them).
Open a new file with a transparent background. Create a new layer and call it "frame". The frame used here is a freebie from Creative Memories (see link in right margin of blog). Load your frame into this new layer.
Then make a new layer and label it "photo". Place your photo on top of the frame, sizing it as desired.
Then move the frame layer up on top of the photo layer.
Then use your eraser tool. I used a couple of different opacities and a couple of different brushes to get this effect. To get that scratchy look I used an eraser tool shape in Paint Shop Pro called "surreal". Erase all the frame from the focal point of your photo, and erase some of it from the edges.
To keep the transparent background, save the file as a .png.
Sunday, September 6, 2009
Freebie roller-skating background

Here's a background I made with the roller-skate drawing. The texture came from www.grungetextures.com.
Copyright Lisa Twede, 2009: Free for personal use. Contact me for commercial use.
Roller-skating Freebie!
This is a drawing of roller-skates I did. It is a .png image with a transparent background.
Copyright 2009 Lisa Twede: Feel free to use this for personal use. For any commercial use, please contact me.
Saturday, August 29, 2009
Freebie Happy Halloween

I used a free font called Dracula. This font is available at this link: http://www.fontriver.com/font/dracula/ or here: http://www.urbanfonts.com/fonts/Dracula.htm
This is a .png file with a transparent background. You shouldn't see the white if you download and use this file.

Sunday, August 23, 2009
My current picaboo book
This is a link to be able to view the book I'm currently working on. It is just a chronological scrapbook of my life in 2009. I still have some gaps to fill in, like my son's running. I will probably just keep adding pages until the end of the year, and then print myself a copy.
http://preview.picaboo.com/Webview/CoverPage.aspx?user=000000000004B7DF77&album=000000000004DB9119
http://preview.picaboo.com/Webview/CoverPage.aspx?user=000000000004B7DF77&album=000000000004DB9119
Wednesday, August 19, 2009
Grunge
A lot of scrapbooking backgrounds and embellishments have a lovely distressed look to them. This seems to be very popular with both traditional and digital scrapbookers. I certainly like them.
Here is an example of one particular background that I really like, and it is a good example of what I am talking about: http://backgrounds.picaboo.com/Backgrounds/BGViewEntry.aspx?entry_guid=96057cfe7f6e43009a871e4501a63a71&catid=0&subcatid=0
But there are tons of them. Well I've been trying to figure out how to do this. The stock textures you get with Paint Shop Pro, and I imagine most other applications, are too uniform to achieve a look like this.
Well in my quest to figure out how to create this distressed look I've come across a term: grunge. Grunge brushes, grunge textures, etc. I have only begun my quest to create the perfectly grunged background. I haven't figured it all out yet. But I did come across this tutorial for how to make grunge brushes. It says it is written for GIMP or Photoshop, but Paint Shop Pro has all the same tools. I think it can easily be adapted. Haven't tried yet.
http://www.shadow-logic.net/2008/08/13/grunge-brush-tutorial/
But I have a whole new eye for taking photographs now! I want to take photographs of dirty, icky, scratched, marred, beaten, weathered anythings so I can use them to make grunge tools in my quest for the perfect scrapbook background!
Oh, and check out www.grungetextures.com for some grungy photos already available!
Saturday, August 15, 2009


Sunday, August 2, 2009
Freebie 3: Happy Birthday Title

This image has a transparent background.
Copyright notice: You may use this image freely for your personal projects. Please do not represent the work as your own or distribute it. Refer people to this blog instead. For commercial or for-profit use, please contact me.
Friday, July 24, 2009
picnik - free photo editing site

www.picnik.com is a great site! You can do lots of effects on your photos for free, or pay $25/year for more advanced capabilities.
They have neat stickers you can use to embellish. You can correct photo flaws like red-eye and brightness. Check it out. Have a blast!
And just look at these fonts!
With sumopaint for drawing, and picnik for photo-editing, and picaboo for making scrapbooks, you never need to buy any software!
Thursday, July 23, 2009
SumoPaint

SumoPaint (www.sumopaint.com) is a neat free digital art editor. It is more for creating images from scratch than for photo editing. But it is very user friendly and has some neat tools.
I think it could be put to good use making embellishments, backgrounds and other digital scrapbooking elements.
Here is something that took me less than a minute to create.
No software to download. You just go to their site and use the tool.
I don't know how they make money. I don't even see any advertising on their site.
Create and enjoy!
Sunday, July 19, 2009
Freebie: Nationals Title

I followed the tutorial for text along a hand drawn curve and created this title. You can use it for a page about your kid going to nationals for a sporting event! (In my family that would be roller-skating. Perhaps soon it will be running as well.)
Copyright notice: You can freely use this for personal use. For commercial or for-profit use, please contact me. Do not represent work as your own. To pass this along to someone else, please refer them to my blog.
My first freebie!

Hey here are some colorful hearts you can use for embellishing a page! This is a .png file with a transparent background. You should be able to use it with most photo editing programs.
Copyright notice: You may use this freely for personal use. Contact me for any commercial or for-profit use. Do not represent the work as your own.
Saturday, July 18, 2009
First experience with Creative Memories StoryBook Creator 2

Well, I really liked the freebies Creative Memories has on their site. I thought I would try their software and write about how I like it.
It installed OK. There was an update that needed to be installed. That installed OK.
I launched it and tried to create a new project. I picked StoryBook 7X5 Softcover. That is their most inexpensive option at $17.95 for 20 pages. I think picaboo is cheaper. Their cheapest option is $9.99. Fine. Maybe they allow more pages, or use better paper. I haven't seen how the books come out yet, so it's hard to compare.
But the next thing that happened absolutely stumped me. Once you pick your project type, you have to pick a theme. I absolutely LOVE that at picaboo you don't have to pick a theme, you can just create each page from scratch. But the dumb thing was, for the 7x5 Softcover, there were no themes! So the "Next" button is greyed out. They only thing I can do is "Cancel".
Pretty dumb.
Not impressed.
Well I went to their website and downloaded a theme for their 7x5 book. There aren't many selections for a 7X5 book! I picked one I like. You can see what some of the pages look like here. And this did get me past my stuck point.
There are two things I don't like about having to pick a theme for a photobook:
1. I might want to do a simple chronological scrapbook. I might have Christmas pages, Halloween pages, gardening pages, vacation pages all in the same book. So I really want to make each page or pair of pages independently.
2. The colors in the theme may not go with the colors in my photos.
So far, I'm still sold on picaboo.
Digital Freebies from Creative Memories
I just found this. They have lots of neat embellishments for free that you can add to your pages! I'll add to my links section.
http://projectcenter.creativememories.com/digital/digital-freebies/page/3/
http://projectcenter.creativememories.com/digital/digital-freebies/page/3/
Friday, July 17, 2009
How to make backgrounds from your photos with Paint Shop Pro

When you are taking photos of people, flowers, etc., be sure to also take pictures of things that might normally miss your notice - things you think of as background. Why? To use as backgrounds of course - for your scrapbook pages.
At the beach? Take a picture of the sand or the seafoam. Wedding? Be sure to get photos of the cake, food, champagne glasses, even the tablecloths.
Here is a very simple way to turn these background photos into backgrounds for your layouts.
Pull up your photo in Paint Shop Pro. If desired, use the selection tool with rectangle or square selection type and select just the portion of the photo you wish to use. Type control C control V to get this selection into its own image.
On the Effects menu, select Image Effects, then Seamless Tiling. The default selections will probably be what you want. Try a few out to see what they do.
Then save this file in My PSP Files\Patterns. You have saved your background.
To use the background, select New from the File menu to create a new image. Select the height and width dimensions for an entire scrapbook or photobook page. Make sure Transparent is unchecked, and click in the color and texture selection area. Click on the Pattern tab. Click the pattern selector and you will see the pattern you created. Select it. You may change the angle or scale if you like. If you want to see your background print on a diagonal, type 45 into the angle number selector. If you would like to see bigger images and fewer repeats in your background, type a larger number than 100 in the scale number selector. Click OK.
Click OK again on the New Image window.
You should have created a new image with a background made from a smooth repeated pattern from your original photo!
Wednesday, July 8, 2009
How to make letters from pictures with Paint Shop Pro

This is using Paint Shop Pro 9. But I imagine the process is similar with other photo editing sofware programs.
1. Open a photo.
2. If necessary, use the perspective correction tool to get a flat view of the object(s) in the photo.
3. Use the text tool to place a letter on the photo. Arial Black is a good font to use for this.
4. Use the wizard selection tool to select the letter. Use RGB value as the match mode. Get just the letter selected.
5. Right-click on the background layer in the Layers menu and select Promote Selection to Layer.
6. With the Promoted Selection layer selected, type control C control V to cut and paste your photo letter.
7. Create a new image with a solid color.
8. From the Edit menu, select Paste/Paste/Paste as New Selection.
9. From the Selections menu, select Modify/Expand.
10. In the dialog box, enter the width of the border in pixels.
11. Type control C control V to cut the matted letter into its own image.
12. Save your letter.
Saturday, July 4, 2009
First experience with picaboo
Excited about trying out picaboo to make a digital scrapbook. I downloaded their software. It took about 10 minutes. Very easy.
I noticed that part of their software seems to be a way to chat with other picaboo users. Haven't checked that out yet.
But what I really want to do is create a scrapbooky-looking digital page. You can do simple photobooks just like many other sites where you pick a theme, load your photos and voila you're done. But you can also create pages from scratch. This is what I'm about to try out.
Since I'm actually pretty caught up on my scrapbooking, I decided to just do a page about the gardening we've been doing. I have some garden pictures so I uploaded those. Easy-peasy.
After selecting the photos to upload and there are two options there. Create a book and create a card. Hmmm. I want to create just a page. Well I clicked on the create a book, and eventually got to a prompt that let me either create my book by "Auto Create" or "From Scratch". I picked "From Scratch".
Next you can pick the type of cover you want. The prices range from $9.99 to $349.99! Quite a selection.
I like the layout of their software. Very easy to navigate. You've got your photos at the bottom, a main page creation section, and options on the left for selecting backgrounds and other elements. I love the fonts! They have a Dracula font that is really cool.
None of the backgrounds that displayed went very well with the picture for my cover page, so I clicked on "More Backgrounds Online". Picaboo has a feature where any scrapbooker can upload a background and share it with other scrapbookers. This is one of the things that excited me most about this site more than the others. I want to look for some gardening-themed background, or maybe something with a lot of green in it.
I typed "gardening" into the background search. Nothing really grabbed me there. I typed "garden". Got tons of matches this time. The background search is a little slow. These backgrounds range from just photos people have taken to things they've spent their time creating with Photoshop or other software programs. 540 backgrounds show up by using the search word "garden". I picked a green background with curlicues. (I'm very fond of curlicues!)
Oops. Made my first booboo. Accidentally rated the background as 3 stars when I meant to rate it as 5. I don't see a way to correct this. I feel bad for the background designer! I like her background and I accidentally caused her rating to downgrade. Well now I know how it works.
It looks like if you are using Internet Explorer, you can just drag the background from the website to your page. But I use Mozilla. So I have to save the background to my machine, and then upload it into the Picaboo software using the "Get Pictures" button according to their instructions. Hmmm. I don't have a "Get Pictures" button. I have a "Get Photos" button. I'll see if that works. It does. the background shows up where my pictures do. I can just drag and drop it to the background area of my page.
Now it looks like the Picaboo software put a white matting on my photo. I'd love to change the color. I click on "Photo Tools" in the upper-left portion of the window. There are lots of great tools here: red eye removal, contrast and brightness adjustment, rotation, zoom, border style, black and white, sepia. There is a checkbox for "White Border". So I guess the choice is white border or no border. Bummer! What if you want a green border? I guess you have to matte your photos separately in your own photo editing software before you upload them if you want to do this.
OK my first page is done!
I would like to see some additional features for sure. Maybe in a later version. I would like to be able to create a title for a page with big multi-colored fonts, and I'd like to be able to journal in a shape other than a rectangle. It would definitely be nice to matte a photo in other than white. Cropping a photo in interesting shapes would be cool too. So if you want any of these features, I guess you do them in your own photo editing software, and create elements that you can upload.
In all, a great first experience. The software is easy to use, and the community of digital scrapbookers sharing their creations is a HUGE creative advantage over what I've seen from other photo sites.
Thursday, June 25, 2009
Quick Review of Some Photobook Sites
These are sites with tools to let you create a photobook or scrapbook digitally. They print and ship the books. The REALLY nice thing about doing it this way is you can make multiple copies. So for instance, you want to make a yearbook for your child's sports team. You can make a yearbook, buy a copy for yourself and another for the coach, and any other parents on the team can buy a copy if they want directly from the website. You don't have to collect their money or distribute the books. Some of these sites will even pay you a royalty.
They all have various strengths and weaknesses. Some sites are self-publishing sites for writers; others are photosharing sites. But all offer some way to get photos, text and at least some background art into a book form.
First, a straight list of the websites. This isn't yet a complete list. I ran out of time checking these out! So this post will have some follow-up posts.
Of these, I've used lulu.com extensively. I've used walgreens.com once (super easy). And I'm really excited about www.picaboo.com. I like the hand-made scrapbooky look-and-feel, and huge arsenal of creative tools they have. I plan to use them for my next book. I'll write about the experience.
OK here's the list. More info to come!
www.shutterfly.com
www.blurb.com
www.walgreens.com
www.mypublisher.com
www.picaboo.com
www.smilebooks.com
www.photobookexpress.com
Subscribe to:
Posts (Atom)


